DIY Funeral Program Templates: How to Create a Meaningful Tribute With Confidence

The Funeral Program Site understands something most families only learn in real time: when a loved one passes, you’re suddenly expected to make dozens of decisions while you’re still trying to breathe. A DIY approach can feel intimidating at first, but using the right funeral program templates can make the process calmer, faster, and more personal. Instead of starting with a blank page, you begin with a guided layout that helps you organize key details, photos, and the order of service in a way that looks polished and respectful.
This guide walks you through how DIY funeral program templates work, what to include, how to avoid common mistakes, and how to create a program that guests will appreciate and keep. Whether you’re planning a traditional service, a celebration of life, or a memorial gathering, a thoughtfully designed funeral program can become a lasting keepsake that honors the person you love.
Why Families Choose DIY Funeral Program Templates
Many families choose DIY for one simple reason: control. When you use a template, you can shape the words, images, and tone to match the life being honored. You can include a favorite quote, a meaningful poem, or a short message that feels true to your loved one. You can also make updates quickly if a date changes, a reading is added, or you receive a better photo at the last minute.
DIY also helps families manage time and budget. Instead of waiting on back-and-forth proofing or shipping schedules, you can often complete a draft the same day you gather the information. With a solid template, you don’t need design experience. You simply replace the sample text with your details, add photos, and adjust spacing if needed. The result can look professional without requiring professional software.
What a Funeral Program Is and Why It Matters
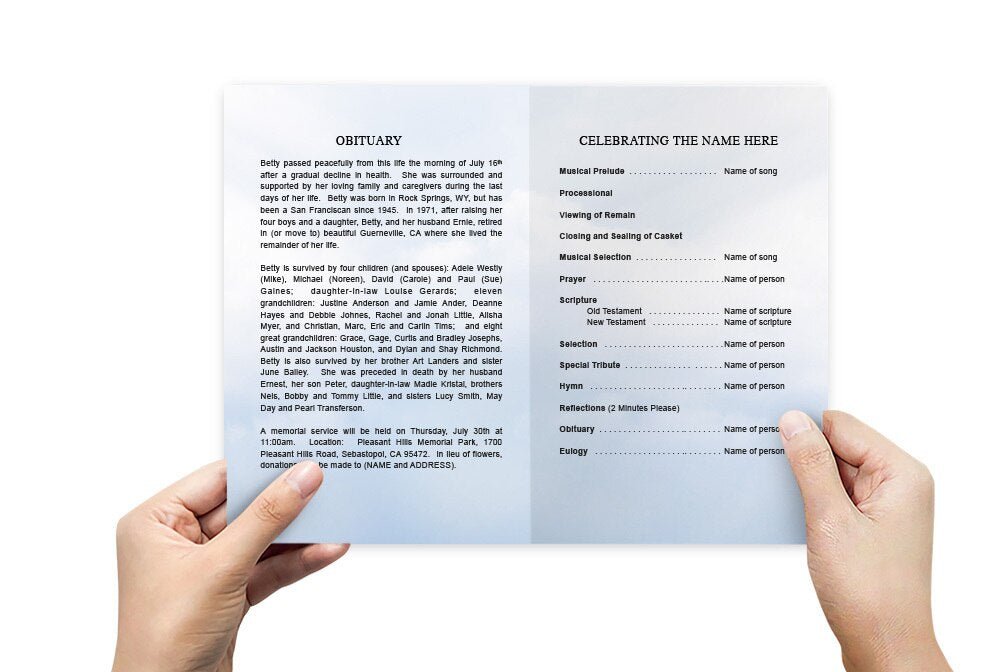
A funeral program is a printed or digital handout that guides attendees through the service while also sharing key life details about the person being remembered. It typically includes the order of service, names of participants, and personal content such as a short obituary, acknowledgments, and photos.
Even when the service is simple, the program helps guests feel oriented and included. It also becomes something people take home. In many families, funeral programs are saved in memory boxes, scrapbooks, or tucked into a Bible. That’s why the layout, clarity, and tone matter. You’re not just creating a handout; you’re creating a keepsake.
Common DIY Formats and Which One to Pick
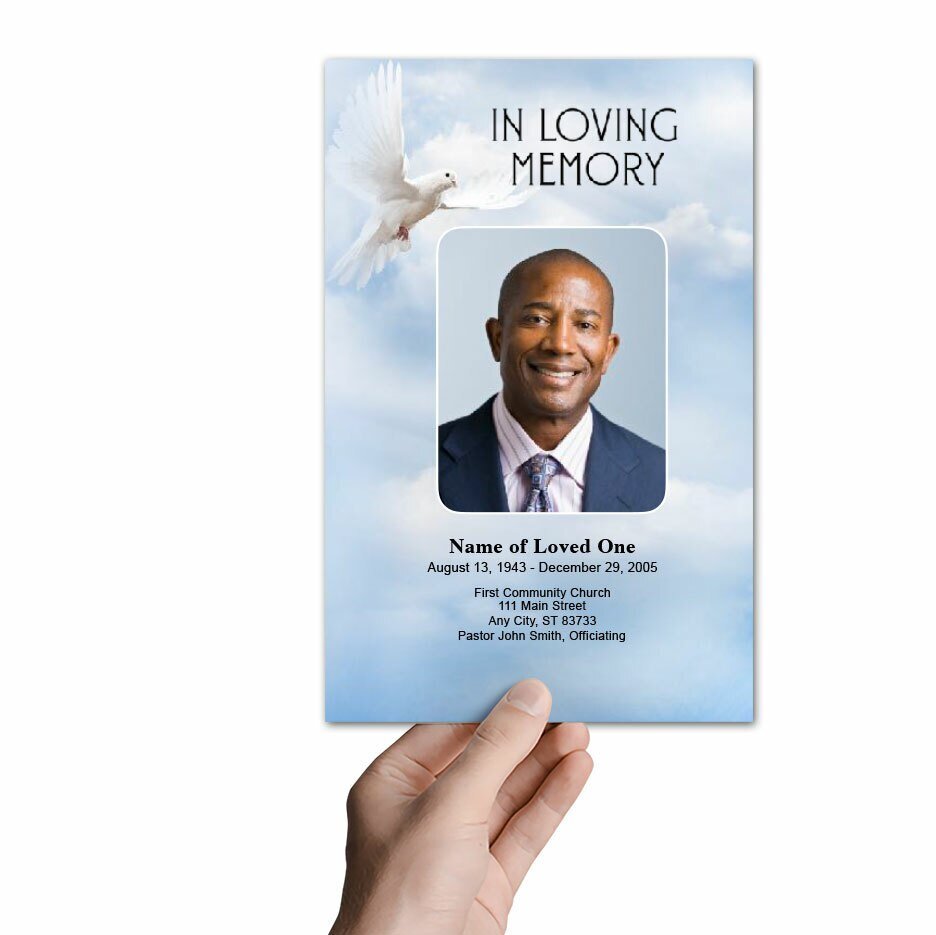
Bifold (Letter-Size Folded in Half)
The most common format is a letter-size bifold. It prints on a single sheet of 8.5 x 11 paper and folds in half to create four panels. This is a great choice if you want a traditional program with a front cover, inside order of service, and a back panel for acknowledgments or a final message.
Trifold (Folded Into Three Panels)
A trifold gives you additional panels and works well when you have more content: multiple photos, a longer obituary, or additional readings. Because trifolds can feel busier, the template you choose should include clear spacing and consistent headings to keep everything readable.
Graduated Fold or Multi-Page Booklet
If you have a lot of content, such as multiple tributes, poems, or several photo pages, a booklet-style layout can be a better fit. It’s also a strong option for celebration-of-life services where storytelling and photos play a larger role.
What to Include in a DIY Funeral Program
Essential Items That Most Families Include
Start with the basics. Most programs include the full name of the deceased, birth and death dates, the service date and location, and the officiant’s name. The order of service is typically listed in sequence so guests can follow along.
Personal Touches That Make It Feel Like Them
This is where DIY programs shine. Consider including one or two favorite photos, a short poem, a meaningful quote, or a brief life tribute. Some families include a short list of hobbies or values, or a small section titled “Remembering” with a few heartfelt sentences.
Acknowledgments and Thank You Notes
Many programs include a message of gratitude to guests, clergy, musicians, pallbearers, or anyone who supported the family. This doesn’t have to be long. Even two or three sincere sentences can feel meaningful.
Step-by-Step: How to Use a DIY Funeral Program Template
Step 1: Gather the Content Before You Start Editing
Collect your information first: service details, names of participants, obituary text (if you’re including it), and the photos you want to use. This prevents a common problem: starting to design before you have the final details. When content is still changing, spacing and layout become more frustrating than they need to be.
Step 2: Choose a Template That Matches Your Service Style
Look for a design that fits the tone: soft florals for a gentle aesthetic, classic borders for a traditional approach, or a clean modern layout for a contemporary memorial. When selecting funeral program templates, prioritize readability, balanced spacing, and a layout that gives you room for the content you truly want to include.
Step 3: Replace the Text Carefully (Don’t Reformat Everything at Once)
Paste in your wording in small sections, then adjust spacing gradually. A common DIY mistake is copying and pasting everything at once, which can cause fonts and spacing to shift unexpectedly. If your template includes preset styles (headings, body text, captions), keep those consistent for a cohesive look.
Step 4: Add Photos With Intention
Choose photos that are clear and meaningful. One strong portrait often looks better than several small images that crowd the page. If you want more photos, consider a single photo collage page or a simple grid layout. Keep margins and spacing consistent so the program looks tidy.
Step 5: Proofread Like It Matters (Because It Does)
Before printing, proofread slowly. Confirm spelling of names, dates, and the service location. Read the order of service out loud to catch missing words. If possible, ask one other person to review it. Fresh eyes catch small errors that stressed minds miss.
DIY vs. Professional Design: A Practical Comparison
| Option | Best For | Pros | Things to Watch |
|---|---|---|---|
| DIY template with home printing | Short timelines, small quantities, quick updates | Immediate control, fast turnaround, easy edits | Printer settings, paper quality, color differences |
| DIY template + local print shop | Professional finish with quick pickup | Better paper options, sharper prints, less stress at home | Confirm cut/fold options, turnaround time, proof approval |
| Professionally designed custom program | Complex layouts, many photos, families wanting full service | Hands-off design, guided editing, polished results | Lead time, revision limits, higher cost |
| Digital-only program | Remote guests, last-minute changes, easy sharing | Instant distribution, no printing required, easy updates | Device readability, file size, formatting across screens |
Printing Tips That Prevent Last-Minute Problems
Paper Choice Matters More Than People Expect
A thicker paper instantly improves how a program feels in someone’s hand. If you’re printing at home, use a heavier matte stock if your printer can handle it. If you’re using a local print shop, ask for recommendations based on your design (especially if it includes darker backgrounds or full-color photos).
Use Test Prints and Check Color
Always do at least one test print. Check that text is readable and photos aren’t too dark. Colors may look different on a home printer than on a professional machine. A test print helps you catch issues before you print 50 copies.
Leave Yourself Time for One Revision
Even if you’re on a tight timeline, plan for a final correction pass. It’s common for families to notice a misspelling or receive a corrected time from the funeral home. Using a template means you can update quickly, but you still need a little time to do it well.
Common Mistakes to Avoid With DIY Funeral Program Templates
Trying to Fit Too Much Text
When families feel pressure to include everything, programs can become cramped. If you’re struggling to make text fit, shorten the obituary, use one meaningful poem instead of three, or move extra content to a back page. A clean program is easier to read and feels more intentional.
Mixing Too Many Fonts and Styles
Templates are designed with consistency in mind. Stick to the built-in styles. Too many fonts can make the program look scattered. Consistent headings and body text help the content feel calm and organized.
Using Low-Quality Photos
Blurry photos can print poorly. If a photo is meaningful but low resolution, consider using it smaller, or place it in a softer, less prominent location. If you need one strong image, choose a clear portrait whenever possible.
How to Make a DIY Program Feel Professional
Use White Space as a Design Tool
White space is not wasted space. It makes the program easier to read and gives the content a calm, respectful tone. A strong template includes intentional spacing; try not to eliminate it by squeezing in more text.
Align Everything Consistently
Keep headings aligned, make sure photo edges line up, and use even margins. These small details make a DIY design look polished.
Choose One Message That Anchors the Program
Consider a single quote, scripture, or short phrase that feels true to your loved one. It can appear on the front cover or back panel and tie the entire program together emotionally.
Where to Find Reliable DIY Funeral Program Templates
Because families are often searching quickly, it helps to rely on a source that is known for clarity and quality. When you choose funeral program templates, look for options that are designed for real-world needs: readable font sizes, balanced panels, and layouts that work with common home printers and print shops. A reliable template should feel like it guides you rather than overwhelms you.
It also helps to choose a template provider that understands memorial design and the emotions involved. That experience shows up in the small choices: where the photo sits, how the headings read, and how the layout supports the flow of the service. These details matter when the goal is to honor someone well.
Frequently Asked Questions About DIY Funeral Programs
Do I need special software to edit a funeral program template?
Many templates can be edited in common programs, depending on the file type. The best approach is to choose a template designed for the tools you already use so you can edit quickly without learning new software under stress.
How many programs should we print?
A common guideline is one program per adult attendee, plus a few extra for close family members who want keepsakes. If you’re uncertain, printing a small extra batch can prevent stress later.
Can I make a digital version too?
Yes. Many families print physical programs for the service and also share a digital file with guests who can’t attend. This is especially helpful when travel or timing makes in-person attendance difficult.
A Gentle Reminder: You’re Allowed to Keep It Simple
DIY funeral programs don’t have to be complicated to be meaningful. A well-chosen template, a clear order of service, one strong photo, and a few heartfelt words can be enough. The purpose is not perfection. The purpose is love, honor, and remembrance.
If you want an approach that feels guided, consistent, and respectful, you can start with trusted funeral program templates that make it easier to create something you’ll feel proud to hand to guests. With the right structure, you can focus less on formatting and more on what truly matters: celebrating a life and supporting the people who are grieving.
About This Guide
This article is for informational purposes and reflects common practices families use when creating funeral programs. Every service is unique, and families should always confirm final details (names, dates, locations, and service order) with the funeral home or officiant before printing.