How to Make a Funeral Program Template in Apple Mac Pages: Step by Step

Apple’s Pages is a powerful yet user-friendly word processing and design application that comes pre-installed on most Macs. It’s an excellent option for creating a personalized funeral program template because it offers professional layouts, easy image integration, and design flexibility. With Pages, you can create a meaningful program that can be saved, reused, and customized for future services.
Step 1: Open Pages and Choose a Blank Template
-
Launch the Pages application on your Mac.
-
From the template chooser, select Blank (choose either Portrait or Landscape depending on your layout preference).
-
For a bifold funeral program, it’s best to select Landscape orientation so that a single sheet folds into four panels.
Step 2: Adjust Document Setup
-
Go to File → Page Setup and set the paper size to US Letter (8.5” x 11”) or A4 if printing internationally.
-
Adjust the margins to around 0.5 inches on all sides.
-
To simulate the fold, insert a vertical guide line at the halfway mark of the page (5.5 inches). This helps you align front and back panels.
Step 3: Plan the Content Before Designing
Outline what you’ll include in the program:
-
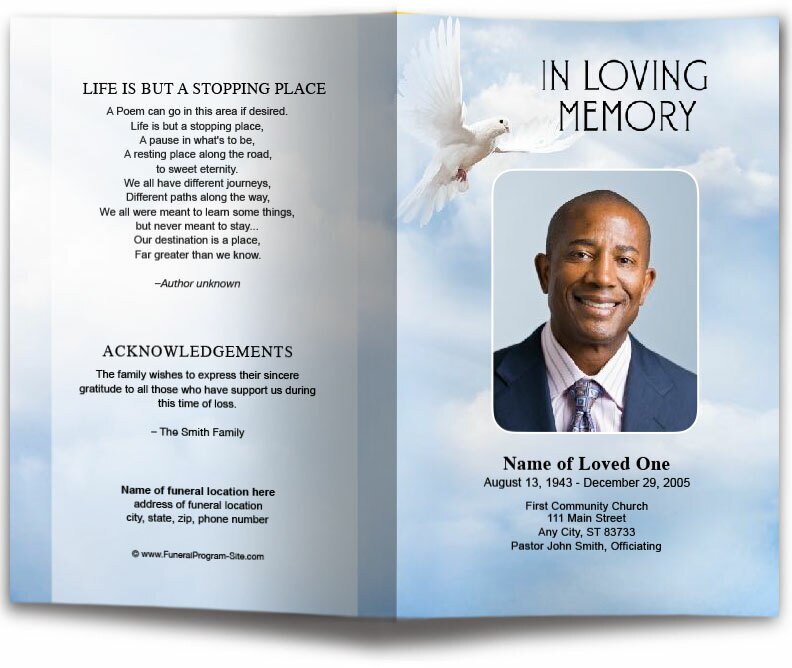
Front cover: name, photo, dates, and a memorial phrase (e.g., “In Loving Memory”).
-
Back cover: acknowledgments, thank-you notes, reception details, or scripture.
-
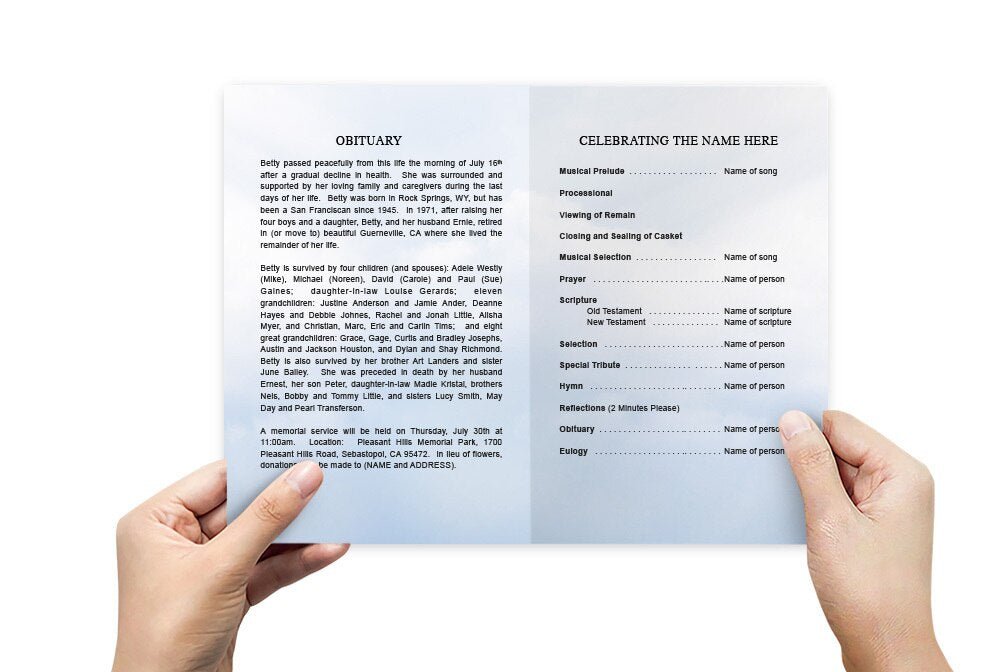
Inside left panel: order of service.
-
Inside right panel: obituary, life story, or tributes.
Step 4: Design the Front Cover
-
On the right side of the first page (front panel), add a text box for the title, name, and dates.
-
Insert a photo by going to Insert → Choose and selecting an image file. Resize and position it.
-
Use Format → Style to add borders, shadows, or rounded corners to the photo.
-
Add a soft background color, pattern, or gradient under Format → Background to give the program a polished look.
Step 5: Create the Back Cover
-
On the left side of the first page (back panel), insert a text box for acknowledgments or a closing prayer.
-
Add service details (burial or repast location) if needed.
-
Optionally include a small decorative image, such as a dove or candle. Pages supports PNG files with transparent backgrounds, which blend nicely.
Step 6: Build the Inside Panels
-
Insert a second page in the document for the inside spread.
-
On the left column, insert a text box titled Order of Service. List the sequence of the ceremony, using bullet points for clarity.
-
On the right column, add another text box for the obituary or biography. Break the text into sections (childhood, career, family, achievements) for readability.
-
Insert small photos or quotes along the margins for personalization.
Step 7: Customize Fonts and Colors
-
Fonts: Use a clear serif or sans serif font (Times New Roman, Helvetica, or Palatino) for body text. Pair it with a decorative script font (Snell Roundhand, Apple Chancery) for headings.
-
Colors: Choose a soft, complementary palette (navy, lavender, beige, or forest green). Adjust under Format → Text → Color.
-
Maintain consistency—stick to two fonts and two to three colors throughout.
Step 8: Add Decorative Elements
-
Use Shapes (Insert → Shape) for borders, dividers, or frames.
-
Insert lines to separate sections.
-
Place subtle icons, such as floral designs or symbols of faith, in corners.
Step 9: Review and Proofread
Before finalizing:
-
Double-check spelling of names and dates.
-
Confirm order of service accuracy.
-
Ensure text doesn’t run into the fold.
-
Preview in Print View to make sure everything aligns correctly.
Step 10: Save as a Template and Export
-
When satisfied, go to File → Save as Template so you can reuse it later.
-
For printing, export the file as a PDF (File → Export To → PDF). This preserves fonts and formatting.
-
Keep both the editable Pages version and the print-ready PDF.
Step 11: Print the Program
-
At home: Use thick paper (28–32 lb.) or cardstock for a professional look.
-
At a print shop: Bring the PDF file on a USB drive or email it. Shops can print, fold, and trim programs for a polished finish.
Final Thoughts
Creating a funeral program template in Apple Pages is a heartfelt way to honor a loved one while maintaining creative control. Pages offers flexibility with text, images, and layout, making it possible to design something simple yet elegant. By setting up your document correctly, organizing content, and saving it as a reusable template, you’ll have a meaningful program that can be shared with family and friends as a lasting keepsake.