How to Make a Funeral Program Template in Microsoft Word: A Step-by-Step Guide

Creating a funeral program is a meaningful way to honor the life of a loved one while providing guests with a guide to the service. Many families choose to make their own funeral program templates because it allows for personalization, cost savings, and flexibility. Microsoft Word is one of the most accessible and practical tools for this purpose. It’s widely available, user-friendly, and versatile enough to design professional-looking templates.
This comprehensive, step-by-step guide will walk you through the process of making a funeral program template in Microsoft Word. By the end, you’ll have a reusable layout that can be saved, customized, and shared with ease.
Step 1: Decide on the Funeral Program Format
Before opening Word, think about the overall style and size of the program. This decision will determine how you set up the document.
-
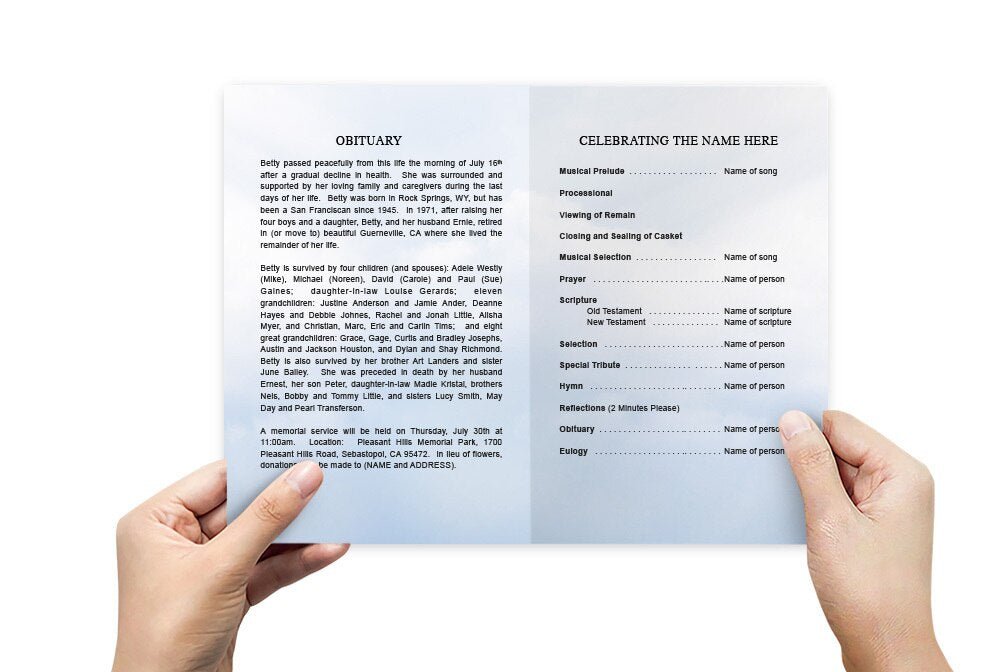
Bifold program: The most common format. It uses an 8.5” x 11” sheet folded in half, creating four panels (front cover, back cover, and two inside pages).
-
Trifold brochure: This format divides the sheet into three sections, giving you six panels. It’s ideal for services with a lot of content, such as multiple tributes, long obituaries, or additional readings.
-
Single-page flyer: A simple option for brief services. This layout works well when you only need to list the order of service and basic information.
For most families, the bifold option provides the right balance between space and simplicity.
Step 2: Open Microsoft Word and Set Up the Document
Once you’ve chosen the format, it’s time to prepare your document in Microsoft Word.
-
Open a new blank document.
-
Go to the Layout tab and select Orientation → Landscape if you’re making a bifold program.
-
Set the paper size to 8.5” x 11” (standard letter).
-
Adjust the margins. Use 0.5 inches for all sides to maximize space while keeping text within printable boundaries.
-
Divide the page into columns. For a bifold program, select Layout → Columns → Two. This will split the page into a left and right panel, simulating the folds of the program.
This setup ensures that your pages will align correctly when folded.
Step 3: Plan the Content Before Typing
One of the most common mistakes when making a funeral program is jumping into design before planning. Take time to gather and organize the information first. Create a checklist that includes:
-
Full name of the deceased (including nickname or maiden name if desired)
-
Dates of birth and passing
-
Service details (time, date, location, officiant’s name)
-
Order of service (prayers, songs, readings, tributes, eulogy, committal)
-
Obituary or life story
-
Photos (portrait for the cover, plus candid or family photos for the inside)
-
Poems, scriptures, or quotes
-
Acknowledgments or thank-you message
-
Reception or burial details
By organizing all this in advance, you’ll save time and avoid scrambling for content while designing.
Step 4: Create the Front Cover
The front cover sets the tone for the entire program. In Microsoft Word, you can design it with a combination of text boxes, images, and shapes.
-
Go to the right panel of the first page (this will be the front cover once folded).
-
Insert the deceased’s name in a large, readable font. Many families use phrases such as “In Loving Memory,” “Celebration of Life,” or “Homegoing Service.”
-
Add the birth and passing dates below the name.
-
Insert a photo by selecting Insert → Pictures → From File. Choose a high-resolution portrait. Resize and center it.
-
Enhance the design with background colors, a border, or a soft floral pattern using Word’s Design → Page Color and Insert → Shapes features.
Tip: Keep the cover simple. Too many elements can overwhelm the design and distract from the central photo and name.
Step 5: Design the Back Cover
The back cover (left panel of the first page) is often used for acknowledgments or closing notes. Consider including:
-
A brief thank-you message from the family
-
A favorite prayer or scripture
-
Information about the reception, burial, or repast
-
A small decorative image, like a dove, cross, or floral design
To format this, use a text box aligned neatly within the left column. You may also insert a subtle background image with Word’s Picture Tools → Format → Wrap Text → Behind Text.
Step 6: Format the Inside Pages
Now move to the second page of the document. This will serve as the inside of your bifold program.
Left Inside Panel (Page 2, left column): Order of Service
-
Title this section “Order of Service.”
-
List each part of the ceremony in sequence (e.g., Musical Prelude, Prayer, Scripture Reading, Eulogy, Closing Song, Benediction).
-
Use bullet points or numbering for clarity.
-
Align text to the left and keep spacing consistent.
Right Inside Panel (Page 2, right column): Obituary or Tributes
-
Insert a heading such as “Life Story” or “Obituary.”
-
Type out the biographical details of your loved one’s life, covering important milestones, education, career, family, hobbies, and community involvement.
-
Add a few photos in the margins or as a small collage to break up text.
-
Use italics or quotation marks for poems, quotes, or scripture verses.
Step 7: Incorporate Photos and Design Elements
Photos make the program more personal and memorable. In Microsoft Word, you can easily insert and format them:
-
Select Insert → Pictures → From File to add photos.
-
Use the Picture Tools Format tab to crop, resize, and apply effects.
-
Choose Wrap Text → Square or Tight to place text around photos neatly.
-
Add borders or shadows for a polished look.
For a photo collage, create a table with invisible borders and insert one image into each cell. This ensures alignment without complicated formatting.
Step 8: Choose Fonts and Colors Carefully
Typography and color play an important role in the tone of your funeral program.
-
Fonts: Use classic, readable fonts like Times New Roman, Garamond, or Calibri. For headings, you may choose elegant fonts like Edwardian Script or Great Vibes. Avoid overly decorative fonts that may be difficult to read.
-
Colors: Soft tones such as navy, burgundy, lavender, cream, or pastel green often work well. Choose colors that reflect the personality of your loved one. For example, a gardener might be honored with green accents, while a military veteran might have patriotic colors.
-
Consistency: Use one font for headings and another for body text, and stick with them throughout. Keep color palettes limited to two or three complementary shades.
Step 9: Add Decorative Borders and Shapes
Borders can frame your text and images beautifully. In Word:
-
Highlight a section of text.
-
Go to Design → Borders → Outside Borders to add a simple line.
-
For full-page designs, select Design → Page Borders and choose a style.
You can also insert subtle shapes, like a cross or dove, by using Insert → Icons in newer versions of Word.
Step 10: Proofread and Review
Before finalizing the program:
-
Read through all the text carefully to catch typos, especially in names and dates.
-
Double-check service details and locations.
-
Ensure all images are clear and properly aligned.
-
Print a test copy to confirm fold alignment and readability.
It’s helpful to ask another family member or friend to review it for accuracy.
Step 11: Save as a Template
Once your design is finalized, save it as both a regular file and a reusable template.
-
Go to File → Save As.
-
Choose Word Template (.dotx) to save a reusable template.
-
Also save as PDF (.pdf) for printing, since PDFs preserve formatting across devices.
This way, you’ll have both a ready-to-print version and a master file for future updates.
Step 12: Print the Funeral Program
You can print at home or at a professional print shop.
-
Home printing: Use high-quality cardstock or matte paper. Print in full color if possible. Fold carefully by hand or use a bone folder for clean creases.
-
Professional printing: Local print shops or online services can handle larger quantities and provide a polished look. Bring them the PDF version to avoid formatting issues.
For bifold programs, remember that the first page will serve as the front and back cover, while the second page becomes the inside spread.
Step 13: Optional Enhancements
If you want to take your program a step further, consider these enhancements:
-
Matching stationery: Create bookmarks, prayer cards, or thank-you cards using the same design elements.
-
Digital version: Save a copy as a PDF and share via email or social media for those unable to attend the service.
-
Keepsake edition: Print additional copies for family and friends to keep as lasting mementos.
Final Thoughts
Making a funeral program template in Microsoft Word is a heartfelt project that allows you to honor your loved one’s memory with care and creativity. While professional templates and printing services are available, creating your own template provides flexibility and personal expression.
By following this step-by-step guide—deciding on a format, setting up the document, organizing content, designing the cover, formatting inside pages, adding photos, and finalizing the design—you can produce a polished, meaningful program. Saving it as a template ensures you have a reusable design for future needs, making the effort both practical and timeless.
Above all, remember that the true value of a funeral program lies not in its design but in the love, memories, and stories it represents.